What you’ll build
This guide walks you through adding a working LiveAvatar to your site using only the LiveAvatar dashboard and a single <iframe> snippet. No build step, no SDK install, and no backend are required.
By the end of this guide, you’ll have an embedded avatar on your page that can answer questions about your product, grounded in your own website content.
Requirements
Before you start, make sure you have:
- A LiveAvatar account — sign up at app.liveavatar.com if you don’t have one yet.
- Somewhere you can paste an
<iframe> — your own HTML page, a CMS block, a Webflow embed, a Notion page, etc.
- (Optional) URL(s) for the avatar to use as reference materials. This includes your docs, product page, FAQ, or landing page. The avatar will generate answers from these pages.
You can follow this guide entirely in Sandbox Mode without consuming credits while you iterate. Create a high-quality voice agent
A voice agent defines your avatar’s persona — a context (what the avatar knows and how it responds) paired with a voice (how it sounds). The quality of the context directly determines the quality of the avatar’s answers.
Head to app.liveavatar.com/voice-agent to get started.
Create a voice agent from scratch
Click Create New to start a voice agent from scratch. You’ll then be able to create a context for your voice agent — the knowledge and personality that drive its responses. The steps below walk through building that context.
Create a context
Build the context that powers your voice agent — its opening line, reference materials, and prompt. The next steps walk through each piece.
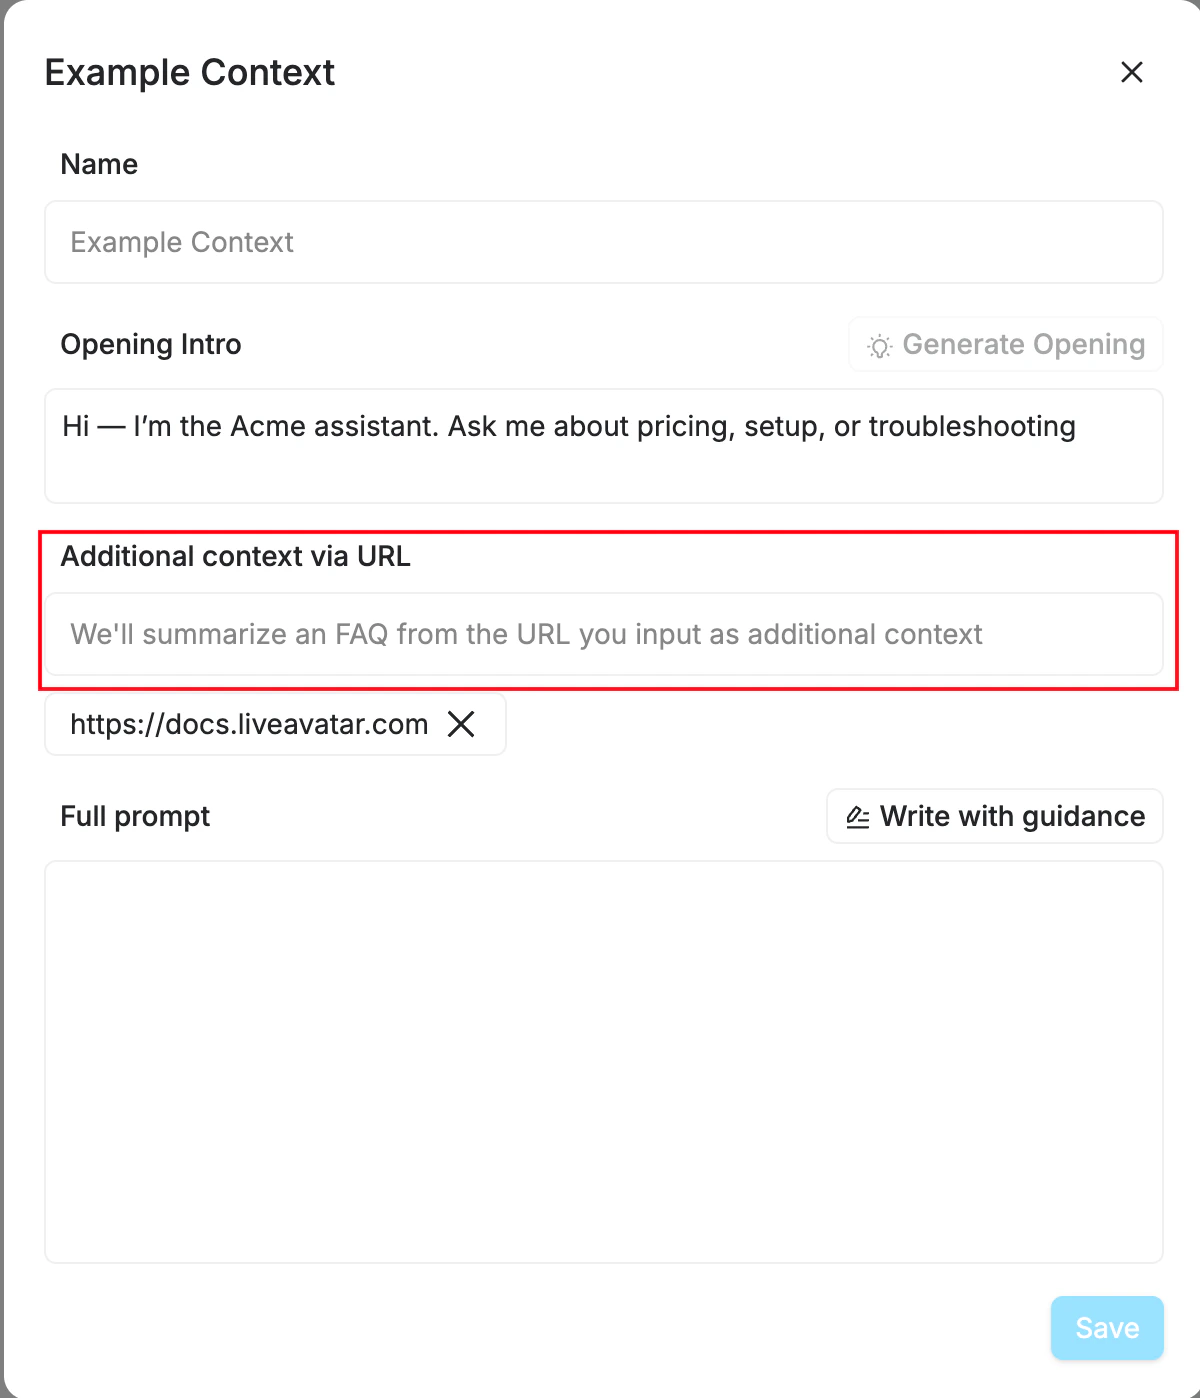
Add an opening line
Give your context a Name and write an Opening Intro — the greeting the avatar speaks when a session starts. Something like “Hi — I’m the Acme assistant. Ask me about pricing, setup, or troubleshooting” primes users on what the avatar can help with before they have to guess.
Add your website as reference material
Under Additional context via URL, paste your links one at a time — your docs homepage, pricing page, FAQ, or any URL that represents what you want the avatar to know about.
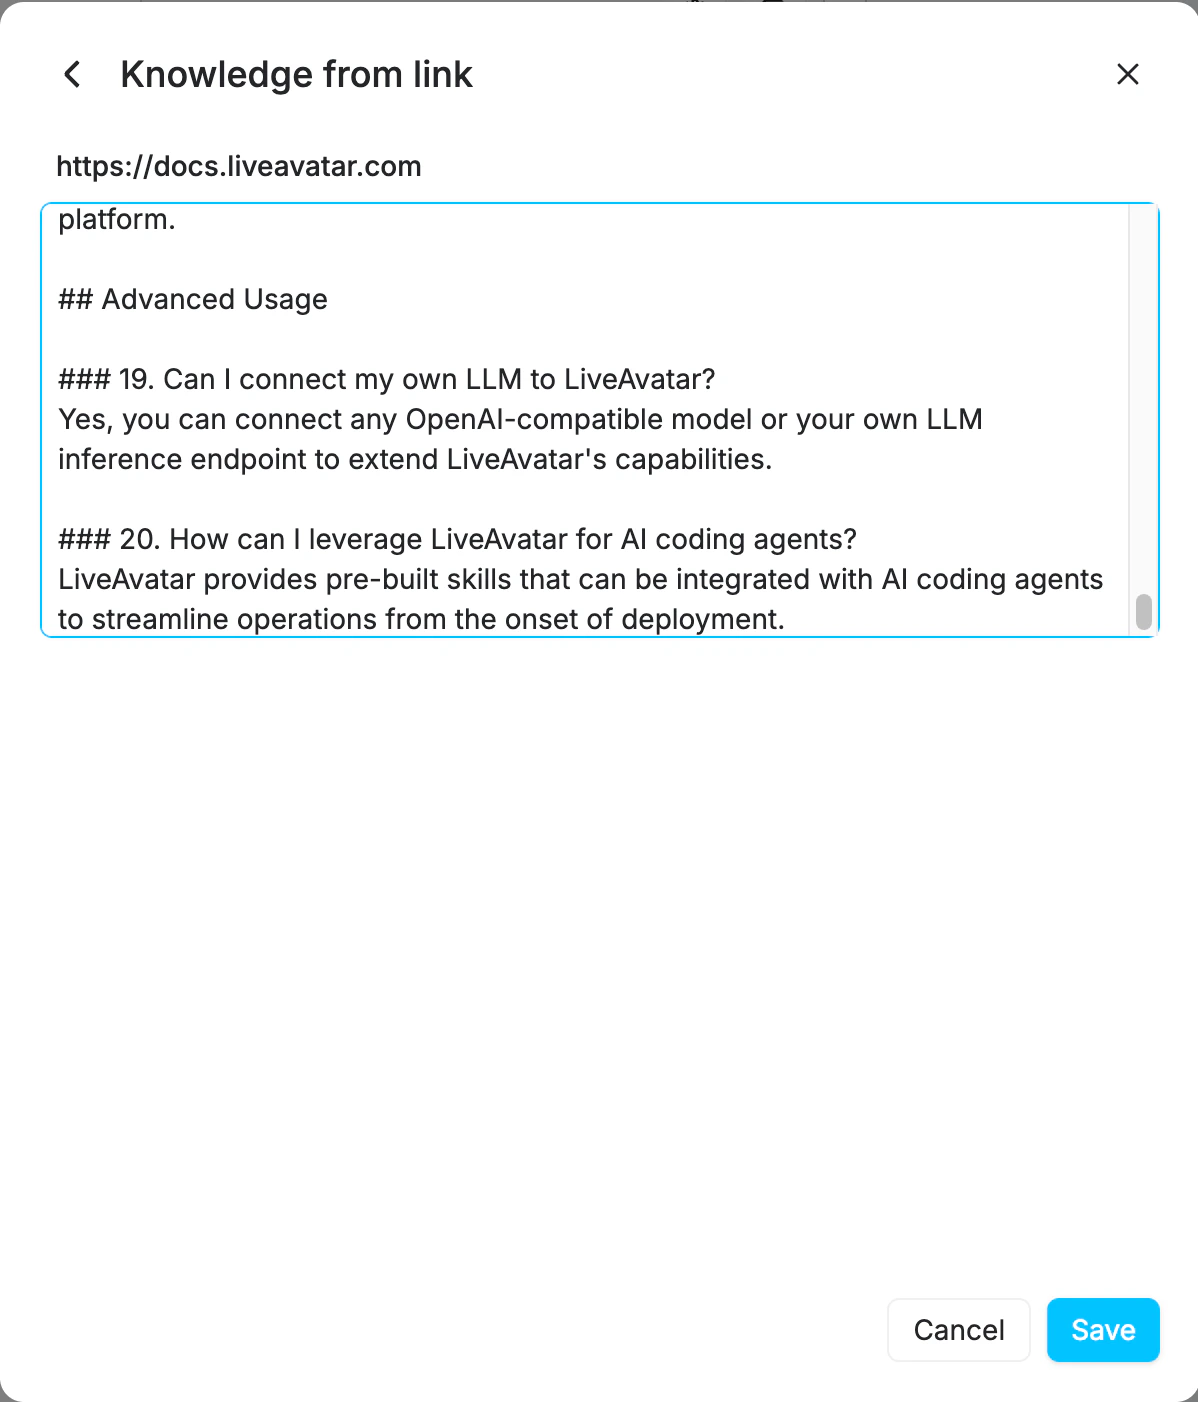
For each URL you add, LiveAvatar fetches the page and generates an AI summary of its contents, which gets attached to the context as knowledge the avatar can draw from.
The generated summary isn’t always perfect — review it before saving. You can edit the text directly in the modal to fix inaccuracies, trim noise, or add detail the model missed.
Write a specific prompt
The Full prompt is the system instructions. A strong prompt is the difference between “a helpful assistant” and “a billing support agent for Acme Corp who only answers questions about our product, in a friendly but concise tone.”
A few guidelines:
- Be specific about the role and company. Don’t leave identity up to the model.
- Set topic boundaries. Say what the avatar should not answer — this prevents drift onto unrelated subjects.
- Define the tone. Formal, casual, technical, playful — pick one and name it.
- Add guardrails. Explicit “never do X” rules protect you and your users.
See Contexts → Tips for writing good prompts for more.
Selecting a voice
Choose the voice your avatar speaks with. Browse the voice library, preview options, and pick the one that fits the persona — tone, accent, and pacing all shape how the avatar comes across.
Once you’re ready, click Save. You can always come back and make edits.
Get your embed script
With your context saved, you can generate the embed code directly from the dashboard.
Select an avatar
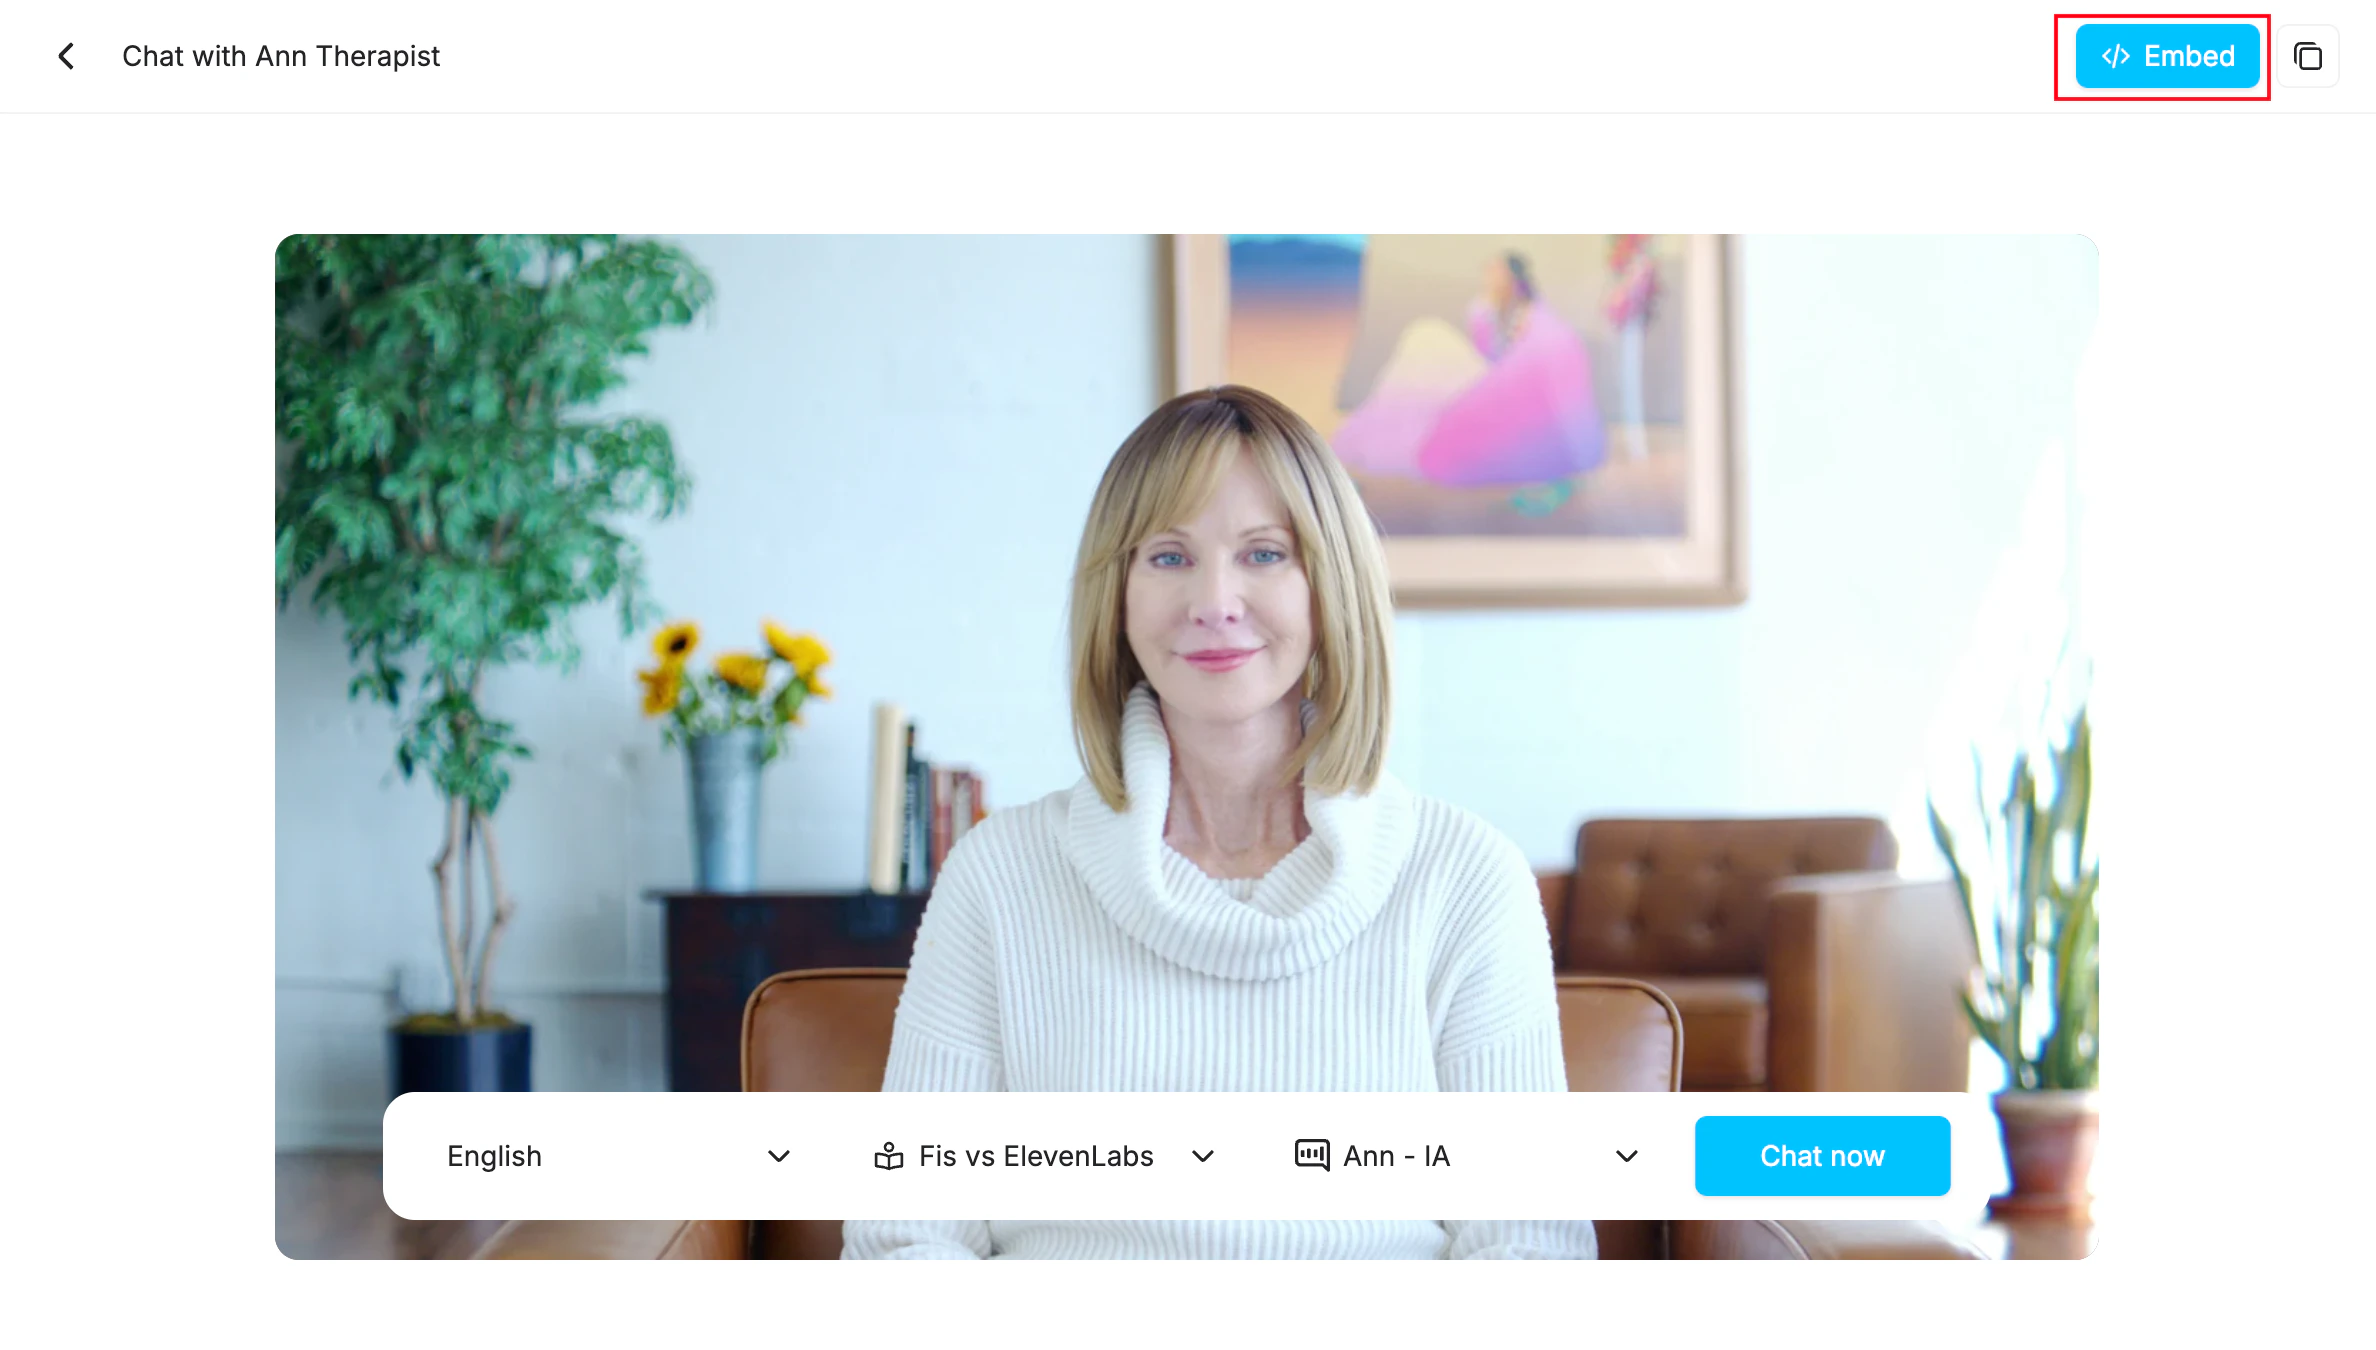
Navigate to the avatar selection screen and pick the avatar you want to use. For this guide, we’ll use Ann Therapist.
Open the embed modal
In the top right of the avatar page, click the Embed button.
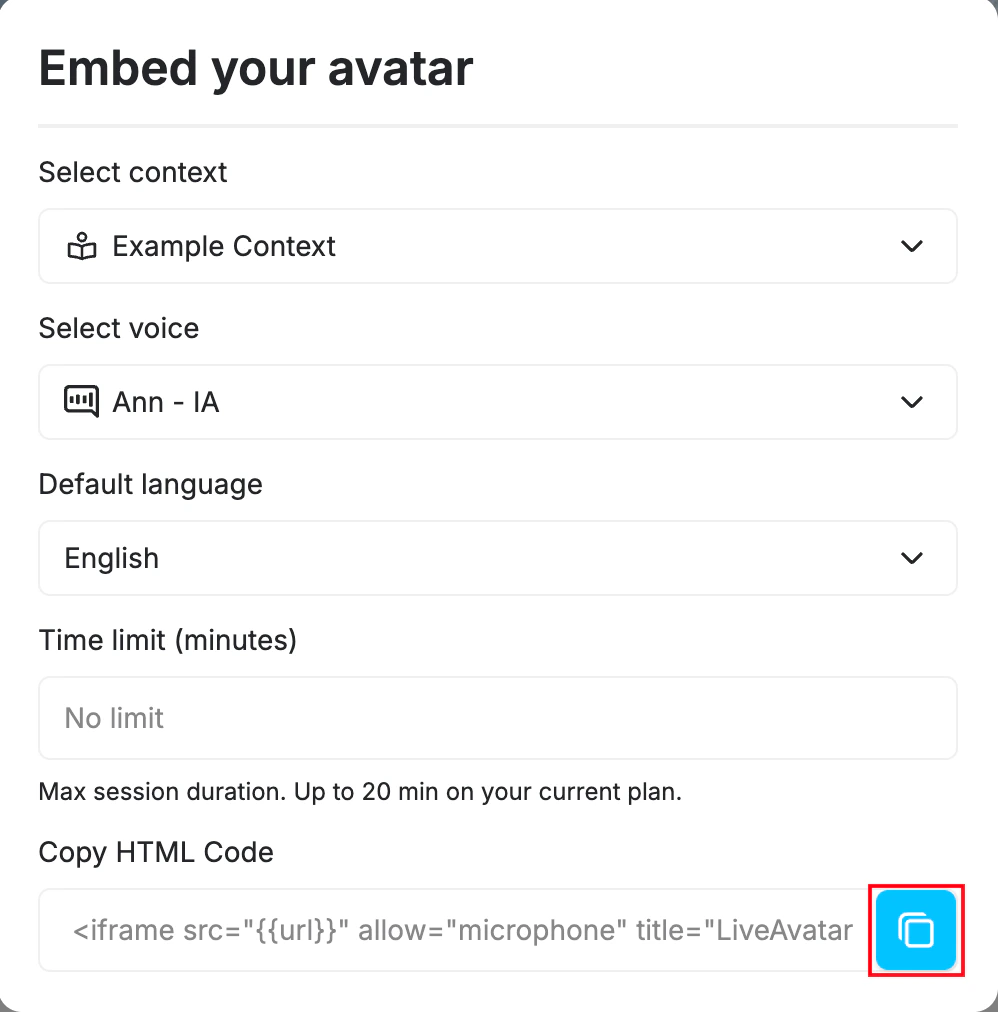
Select the context you created earlier. Adjust the voice, default language, or time limit if needed — the defaults work for most cases.
Copy the embed code
Click the copy icon next to the HTML snippet at the bottom of the modal. Paste it into your site’s HTML, and the avatar will render on the page.
Prefer to generate embeds programmatically? The same embed can be created via this endpoint with your API key, avatar_id, and either a context_id or a voice_agent_id from a stored voice agent.Set is_sandbox while iterating to avoid credit consumption. Improving and iterating
Understand your users
Every live session produces a transcript, which can be retrieved via this endpoint using the session ID. Review transcripts to identify:
- Questions the avatar answered incorrectly or incompletely — the prompt or reference URLs are likely missing the relevant information.
- Topics you didn’t anticipate — add them to the prompt or extend your reference URLs.
- Off-topic responses — tighten the topic boundaries in your prompt.
- Tone mismatches — adjust the tone instructions in your prompt.
Update your context to fill in these gaps over time.
Contexts update in place, so you don’t need to regenerate the embed. Edit the prompt or reference URLs in the dashboard and the changes apply to new sessions immediately.
Expand your integration
When you’re ready to go further, consider:
- Building a reusable voice agent that bundles voice and context into one persona.
- Swapping in a different avatar or voice to match your brand.
- Exploring FULL Mode configurations such as Push-to-Talk or a custom LLM.
- Building a custom UI with the Web SDK for deeper control over rendering and interaction.